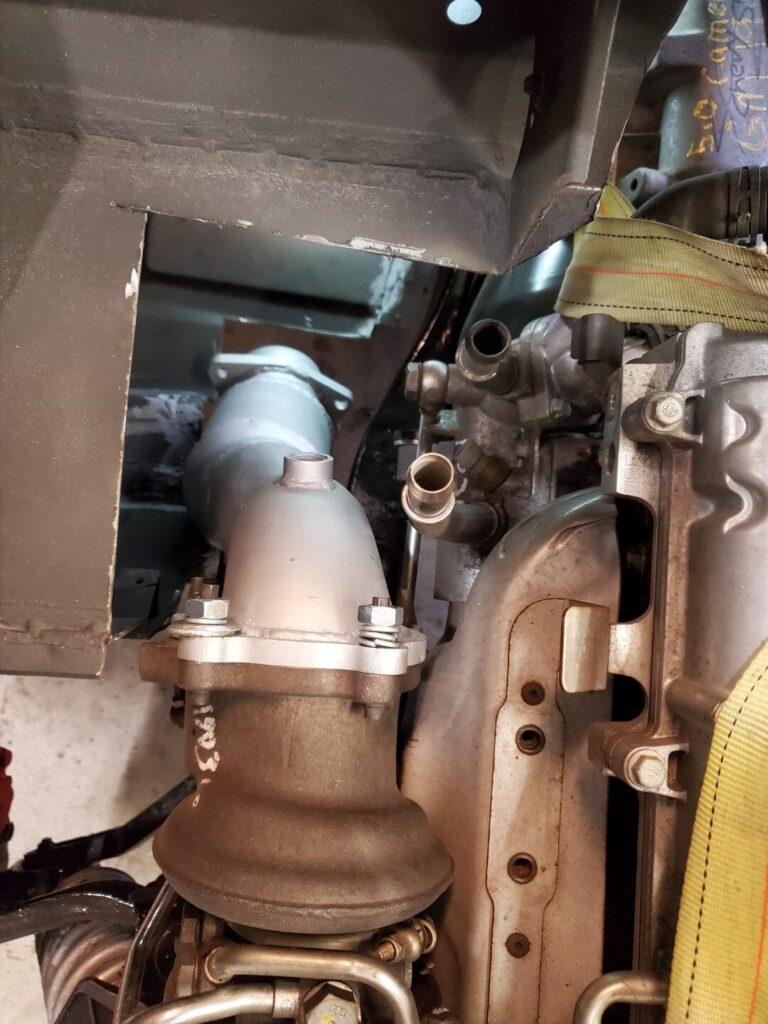
As you’ve hopefully seen in the previous posts, the engine did not fit with the stock firewall. That would have been ideal, but it just wasn’t in the cards. It was too tall to fit under the stock bonnet, which I wanted to retain. The fix for that was to move the engine back a bit (behind the rack), which means the firewall had to be massaged. The other issue was the downpipe from the turbo, which sticks out quite a bit. I ended up modifying the downpipe quite a bit to actually sit behind the forward outrigger as that was my only option. This means the passenger will have a bit less room, but they don’t matter much anyway, and my wife is only 5’2″.
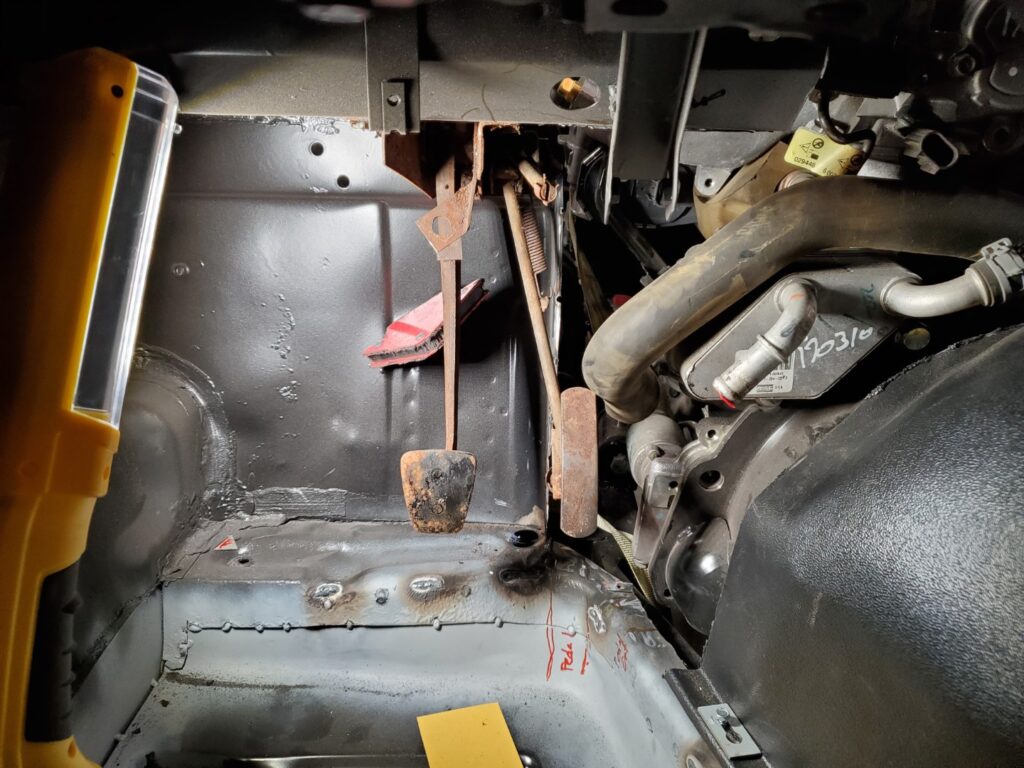
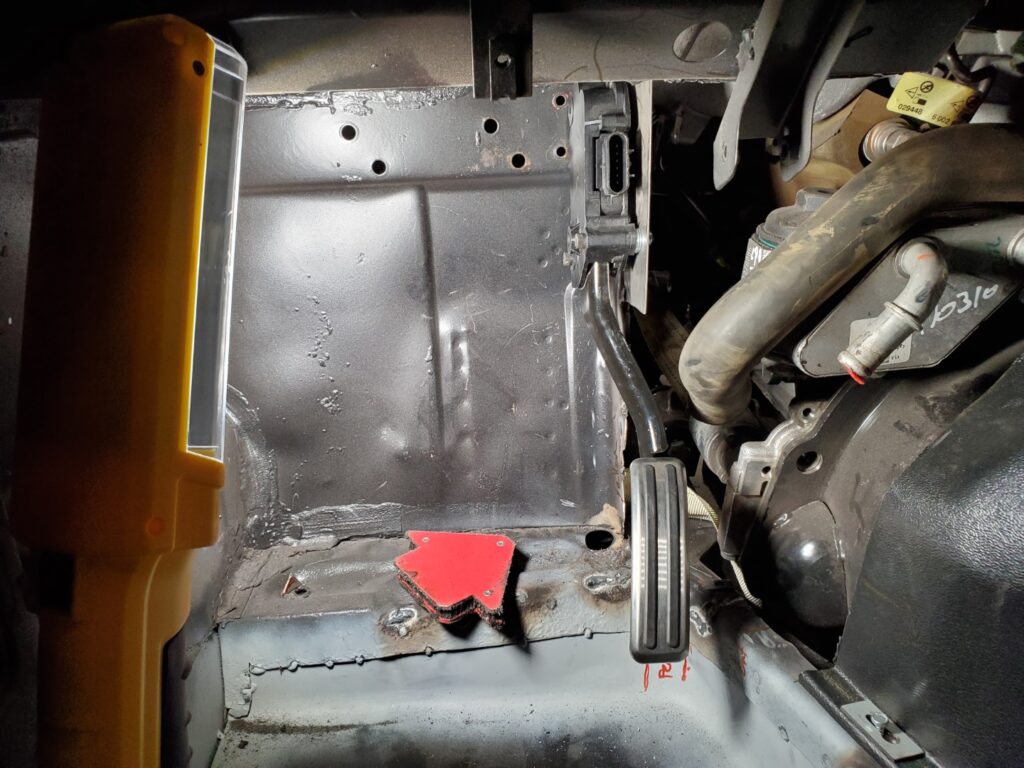
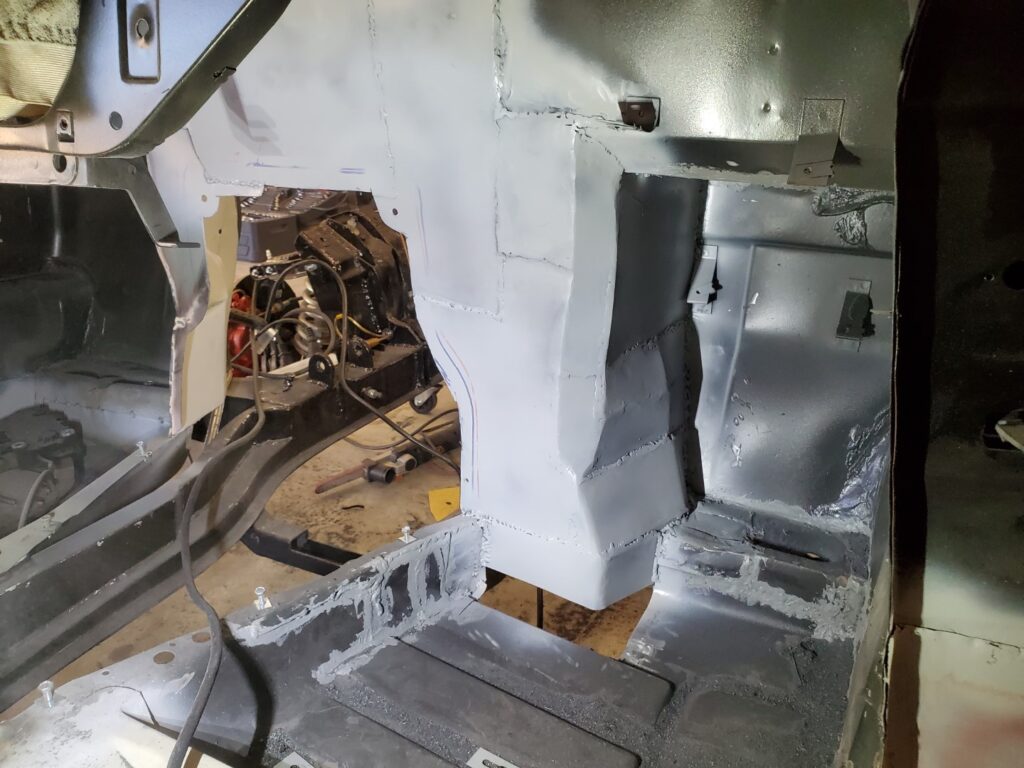
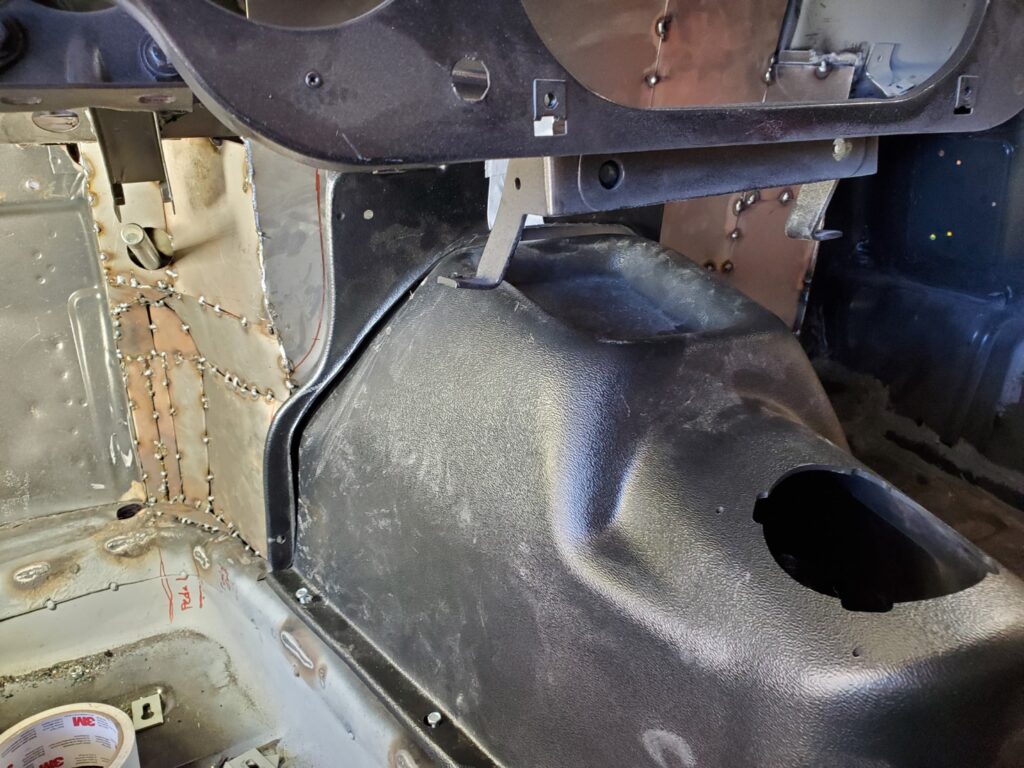
You can see how the downpipe/cat sits behind the outrigger now and how much of the firewall had to be removed, as well as how much I had to take off the new plastic transmission tunnel up front to not hit the engine. I also put in a picture of the stock pedals and the mocked up new DBW pedal so you can see how close those match!

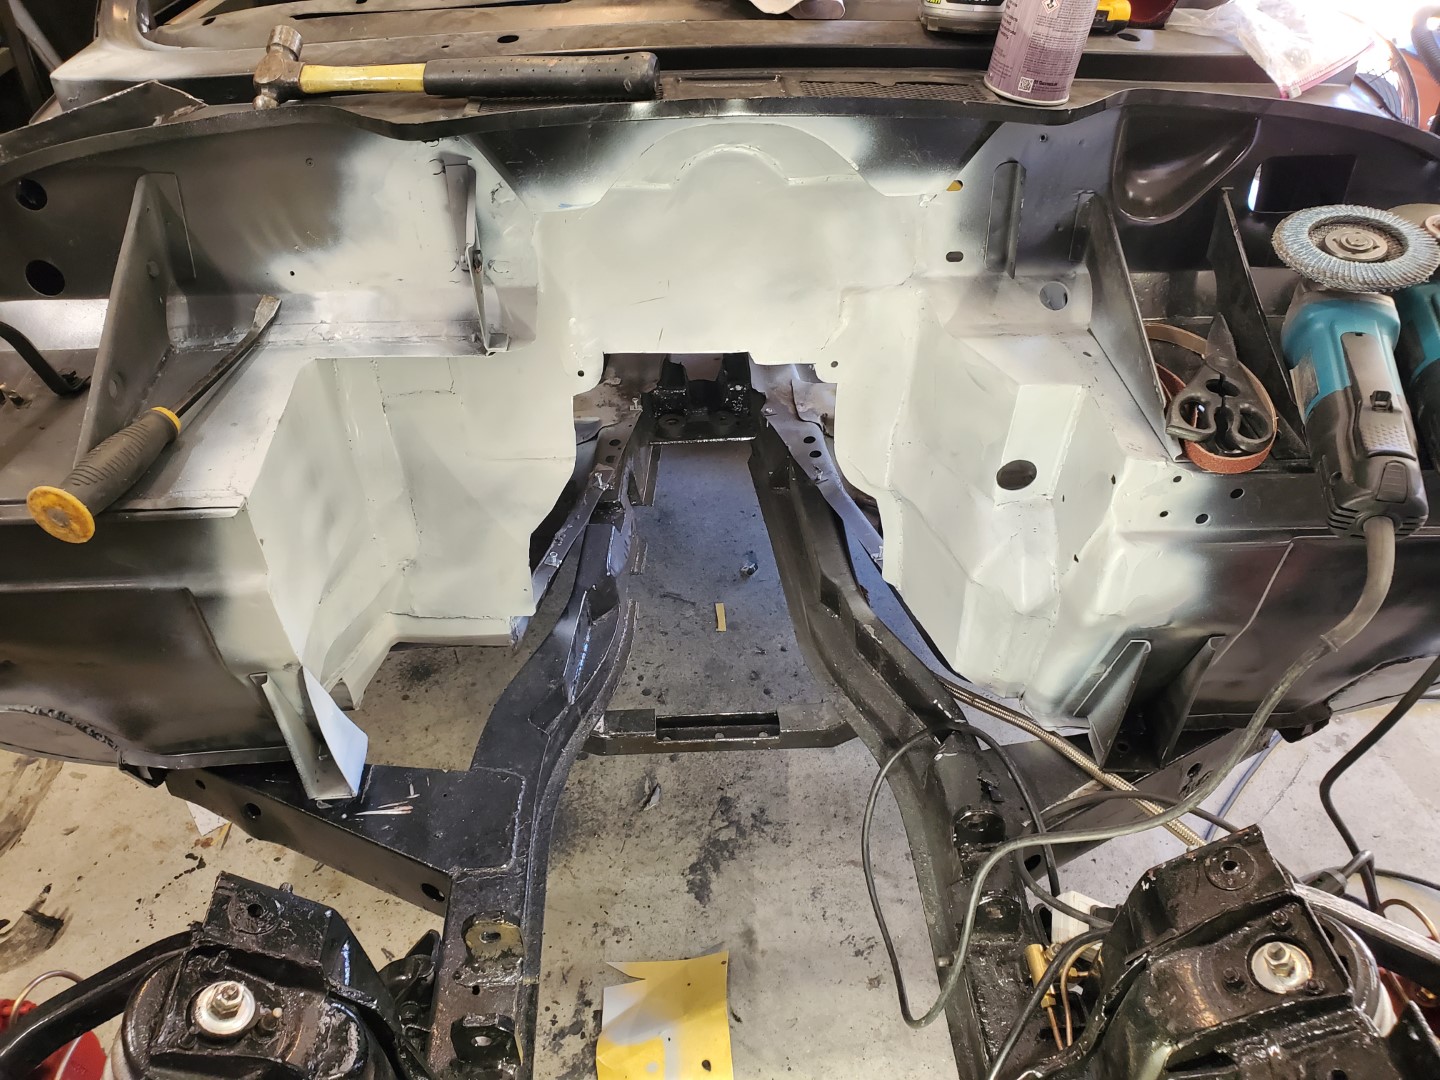
Next up was to build the firewall. This is by far the most metalwork and welding I’ve ever done other than basic repairs, and most of it was in very cramped places. Please be gentle on those comments.
This took me several weeks of work due to the massive amount of work, rework, welding, grinding, etc. I only have a tiny 16″ bench metal brake, nippers, and a grinder so I had to do this in a very faceted way. That’s why you see so many metal pieces to make relatively simple parts.


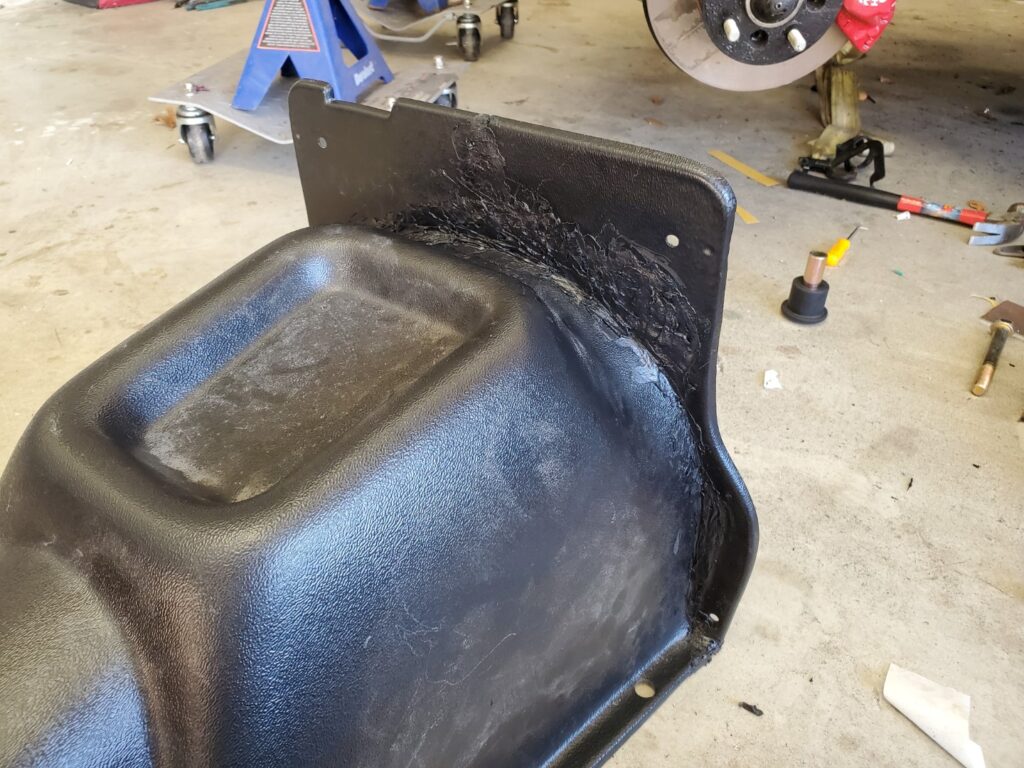
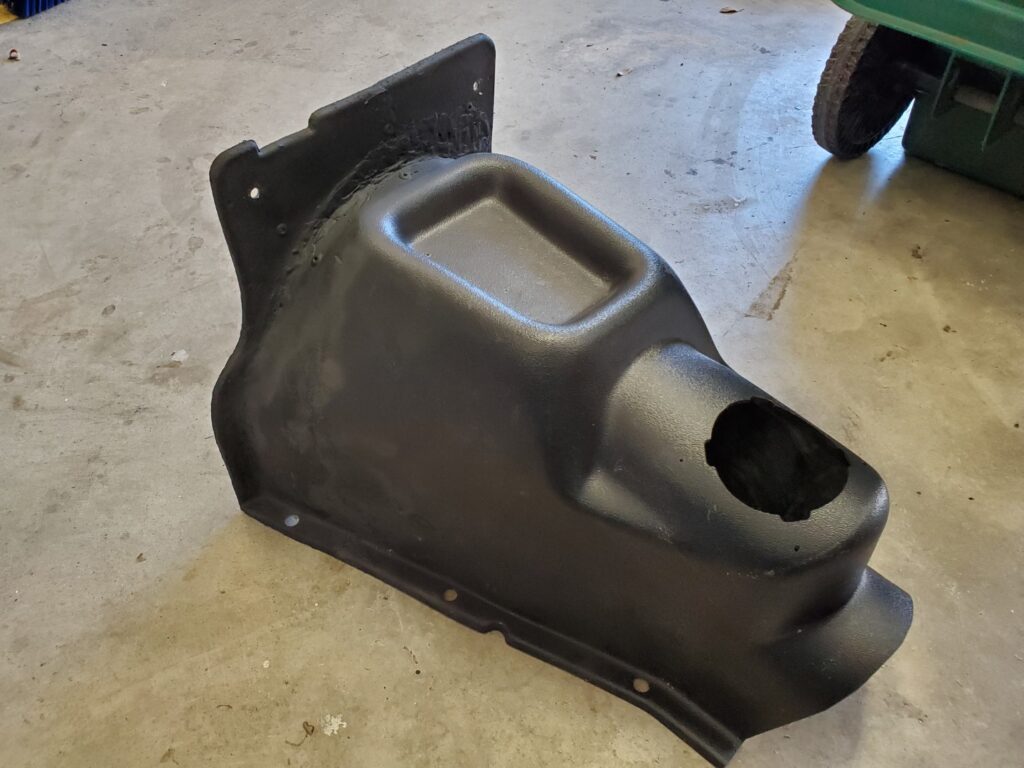
Finally, I had to remake parts of the transmission tunnel. I had purchased the plastic one since my car didn’t come with a tunnel. It ended up needing a lot taken off the front due to the incursion of the engine, so I cut it down and remade the front. I initially made this by plastic welding the front flange to the shortened body, and then reinforcing with steel strips and rivets. When I was happy with the shape, I put layers of fiberglass on the inside and out to give it strength, as the plastic welding is pretty fragile.


I took out the assembled engine and transmission to verify I could get it out without removing the body from the frame, and I was able to! This will make servicing things a lot easier, as removing the body will be a lot more of a pain once everything is assembled.
Here’s is the picture of the complete new firewall and transmission tunnel!
